Purchasing New Numbers
Sail numbers are available from many online websites. Here is a partial list:
• http://www.sailrite.com/Sail-Numbers-Black
• http://www.apsltd.com/sailboat-marine-accessories/deck-rigging-sail-accessories/sail-numbers.html
• http://www.sailworks.com/sail-numbers.html
• https://graphics.northsails.com/shop/sail-numbers/
Note: Order the same sized numbers as you remove if your class does not specify size.
Removing the Old Numbers
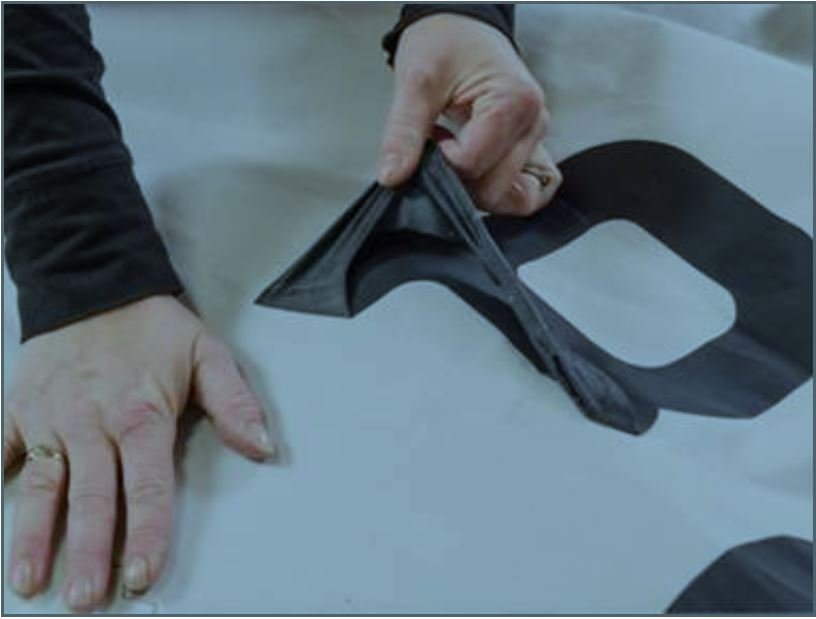
• Peel off the old numbers.
• To remove the sticky residue, use 3M Adhesive Cleaner. Apply solvent to a soft cloth and rub over the adhesive until the solution can soak in. Leave the sail for a bit while the solvent soaks in.
• Using a terry cloth or other soft towel, scrub off the glue residue
Adding New Numbers

When adding your new numbers or insignia, be sure to refer to class rules on where to position the markers on your sail.
• Allow the sail to dry out.
• Starting at a short edge, peel back a small section of the backing paper. Stick the corner in the desired location on the sail and smooth it out, making sure there are no air bubbles
• Working slowly, continue to peel small portions of the paper off and smooth out the Dacron. Take care on numbers with a hole, to not stretch the Dacron material as you apply it.
• When you are satisfied with your placement, allow the adhesive to cure for 24 hours. After this time, the glue will be permanent.
One approach is to use a process similar to applying decals to boat hulls:
• After removing the old numbers, lay the new numbers on the sail in the desired position.
• Lay a strip of masking tape down the middle of the numbers so they are immobilized on the sail.
• Raise up one side of each number and peel the backing off down to where the masking tape is.
• Using scissors cut the backing off where it meets the masking tape.
• Carefully lay the number back down on the sail avoiding wrinkles or bubbles and smooth it out.
• Repeat this process until one side of all the numbers has been glued to the sail.
• Remove the masking tape.
Alternative Approach:
• Starting at a short edge, peel back a small section of the backing paper. Stick the corner in the desired location on the sail and smooth it out, making sure there are no air bubbles
• Working slowly, continue to peel small portions of the paper off and smooth out the Dacron. Take care on numbers with a hole, to not stretch the Dacron material as you apply it.
• When you are satisfied with your placement, allow the adhesive to cure for 24 hours. After this time, the glue will be permanent.
W-P Sail Number Positioning: The numbers on the STARBOARD side go 1"-2" BELOW the middle batten, while the numbers on the PORT side go 1"-2" BELOW the numbers on the starboard side (see image below). You can use the numbers themselves for spacing, they are spaced at least one number-width (any number except "1"!) from the leach, and at least the width of the "1" apart. HINT; do the starboard side first, then put the port numbers on in reverse order (from the leach) using the starboard numbers as a guide.
“CR” (CLYC designation) is positioned just above the middle batten on the port side, and the starboard side a couple inches above the “CR” on the port side (below):


